How To Make a Brush‑On Mold with a Lightweight Support

Overview
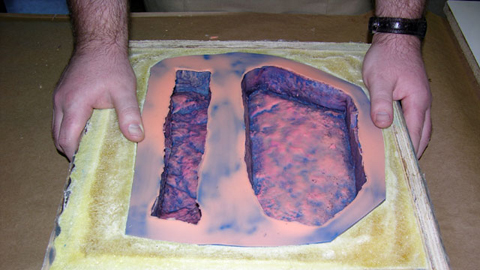
The advantage of making a mold by brushing rubber onto the model is that it minimizes the amount of rubber used, saving you material costs. Making a brush-on mold, however, requires more time and labor vs. pouring rubber. The following is a demonstration on how to make a mold of stone veneer using Rebound™ 25 Platinum Mold Rubber and Foam-It® 5 Rigid Foam as a rigid lightweight foam backer. Rebound™ 25 is an incredibly strong flexible rubber. Mixed 1A:1B by volume (no scale necessary), Rebound™ 25 self thickens and will hold a vertical or inverted surface and will cure to a soft Shore 25A rubber. Foam-It® 5 Rigid Foam consists of a two-component system that is versatile and easy to use. Foam-It® 5 will expand many times the original volume and develop a uniform cell structure.
Materials Used in this Tutorial
- Melamine Board
- Glue Gun
- Ease Release 200
- Mixing Sticks
- Mixing Containers
- Rebound 25
- Paint Brush
- Silc Pig
- Razor Knife
- Sonite Wax
- Foam-iT 5
- Drill
- Screws
- Thi-Vex
Step 1: Preparing Working Surface
Secure the original models to an acrylic coated baseboard with hot melt glue to prevent movement during the mold making process. Place the models in the center of the baseboard, while keeping a 1'' (2.5cm) space between the stones. Spray all surfaces with Ease Release® 200 Mold Release.
Step 2: Dispensing and Applying Rebound 25
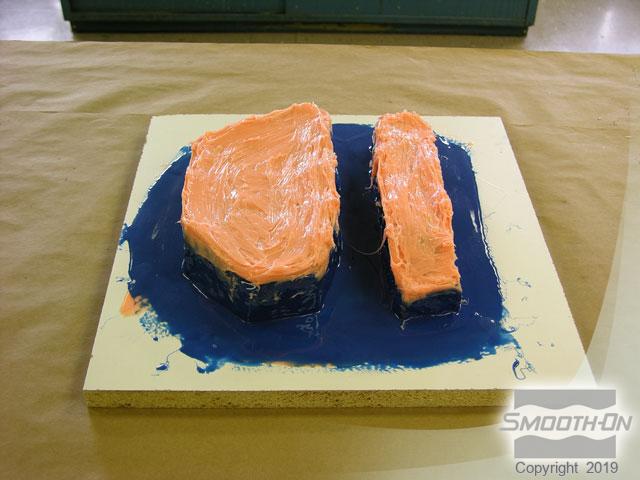
Dispense equal amounts of Rebound 25™ A + B into a mixing container and mix thoroughly, making sure to scrape the sides and bottom of the container many times. Continue mixing until you have eliminated all color streaks. Then, brush a very thin layer onto model, taking care to work the rubber into the fine detail. Cover the entire model and create a 3'' (7.6 cm) flange in all directions around the model. Allow the rubber to cure for 60 minutes until tacky.
Step 3: Dispensing and Applying 'Second Layer' of Rebound™ 25
Mix and apply another layer of rubber, this time adding a small amount of SILC-PIG® color pigment to help distinguish one layer from the next. The rubber should be sticky to the touch, but does not come off onto your glove. If the rubber is still wet, do not apply the next layer yet. After the model and board are covered, let the rubber cure for 60 minutes until tacky.
Step 4: Dispensing and Applying Rebound™ 25 with Thi-Vex
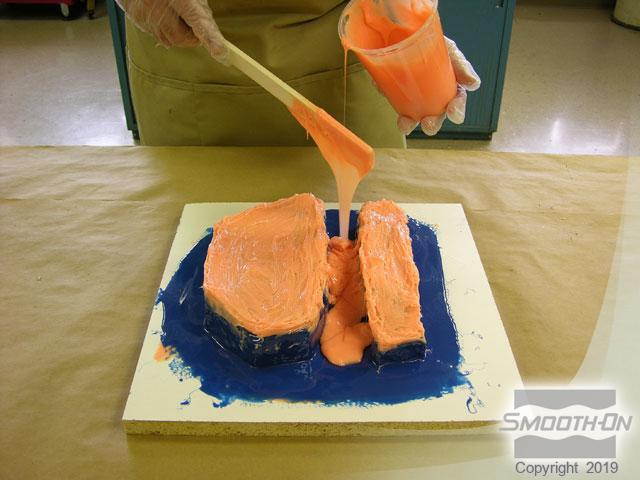
Measure and mix a small amount of Rebound™ 25 A+B. Add 4 drops of Thi-Vex thickener to every 1 oz. of mixed Rebound™ 25. Use the thickened rubber to build up sections for support. The top of the mold is reinforced.
Step 5: Dispensing and Applying 'Third and Fourth Layers" of Rebound™ 25
Mix and apply a third small batch of rubber. After the model and board are covered, let the rubber cure 60 minutes until tacky. Then, mix and apply a fourth and final layer of rubber. Let all layers cure for at least 6 hours at room temperature. (72˚F/22˚C)
Step 6: Constructing and Preparing Mold for Support Shell
Construct a mold box and secure with drywall screws. Use a razor knife to trim the rubber. Sharp clean edges will help the rubber mold register with the support shell. Center the mold box over the mold and seal all seams with hot melt glue. Apply a liberal coat of Sonite Wax® to the entire surface of the mold, baseboard, and mold box.
Use a piece of melamine board to completely cover the mold opening. This will minimize voids in the foam with back pressure. Using a ¾” (2 cm) drill bit, drill 2 holes in the board spaced a few inches/cm apart. Next, apply a liberal coat of Sonite Wax.
Step 7: Dispensing and Applying Foam-iT 5
Measure and mix equal amounts Foam-iT!® 5. Foams expand to full volume in 5 minutes, develop handling strength in 30 minutes, and fully cure in two hours. Pour Foam-iT!® 5 into the mold cavity. Remember, these products cure quickly, so do not delay between mixing and pouring.
Make sure that, when the board is placed over the mold opening, the holes are over the mold cavity and rising foam will be able to make it through. Hold the board firmly in place while the foam rises in the mold cavity and some foam grows out of the drilled holes. After the foam stops growing, you can let go of the board.


